Every great blog that gets read by thousands of people every month has one things in common. An easy to understand Menu that provides excellent navigation to all of its wonderful content. One of the things that I love about WordPress is how easy it is to make this type of Menu, that you can easily adapt as your content profile grows.
Let’s go ahead and setup the Menu for this blog, so you can see how easy it is.
Creating the Main Menu Structure
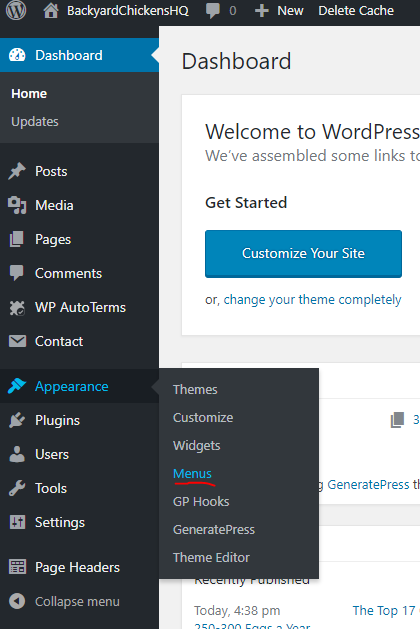
From the Dashboard, hover your mouse over Appearance on the left-side and click on the Menus link.
Add Important Pages
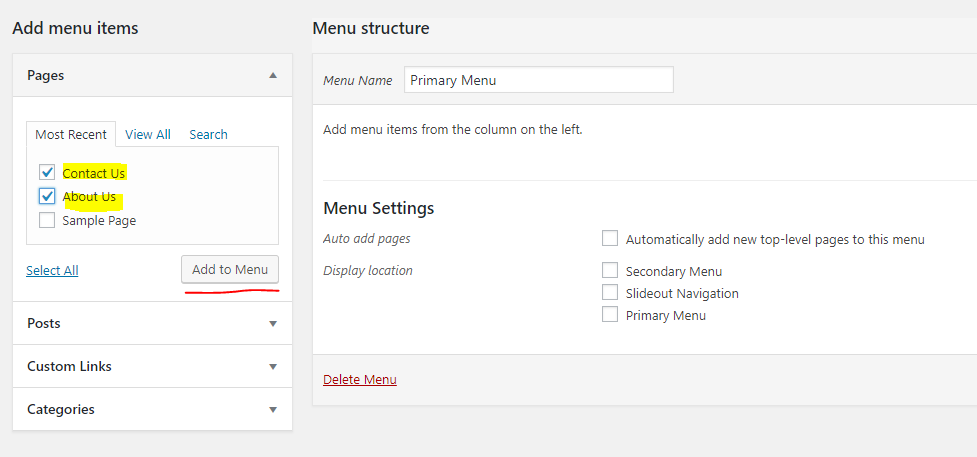
Under Menu structure, give your new Menu the name Primary Menu and click the Create Menu button.

Add the Contact Us and About Us pages to the Primary Menu by selecting them from the left-side under Add menu items and then clicking the Add to Menu button.
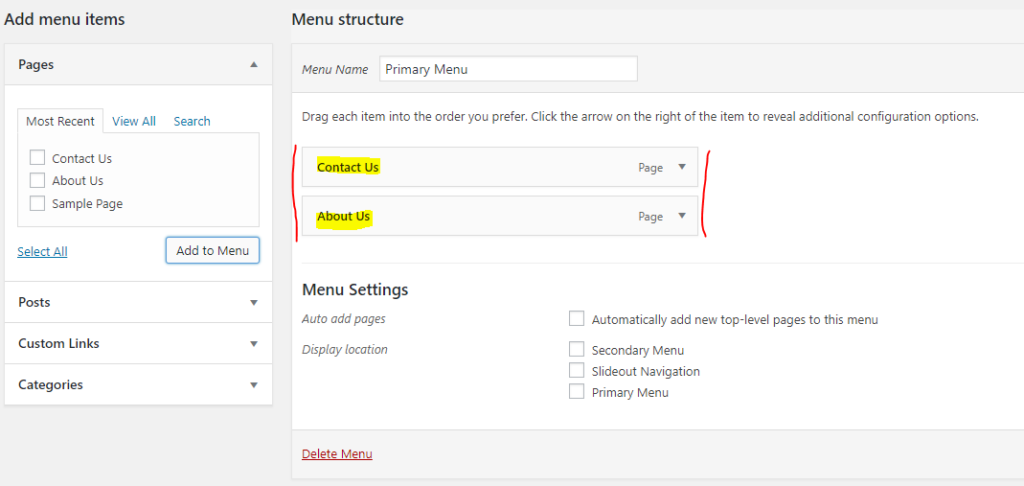
It will look like this when you are done.
Add Blog Categories
To add the blog’s categories to the Primary Menu, we are going to make a parent item on the menu that readers will hover their mouse over and it will show them all the available categories.
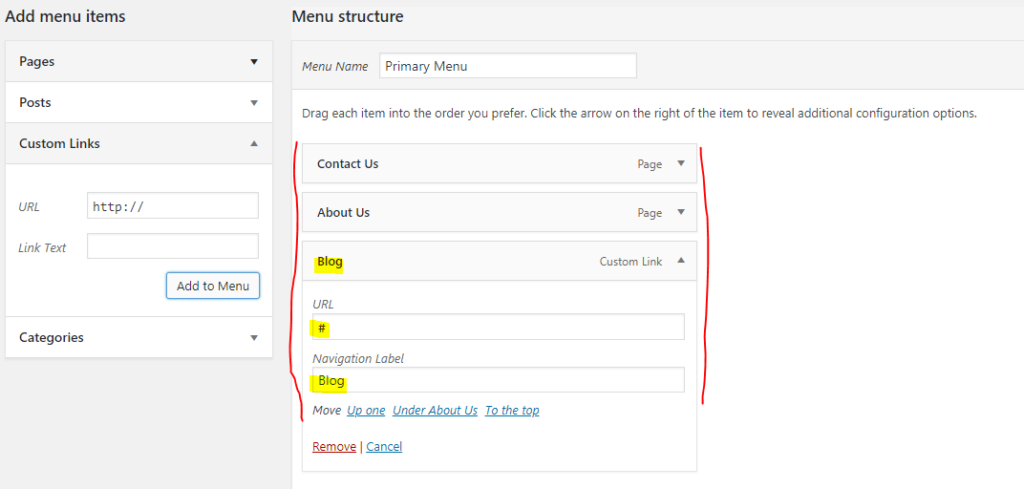
To do this go back to Add menu items on the left-side, select the Custom Links section, under URL put a hash symbol or pound sign, put the word Blog under Link Text, and then click the Add to Menu button.
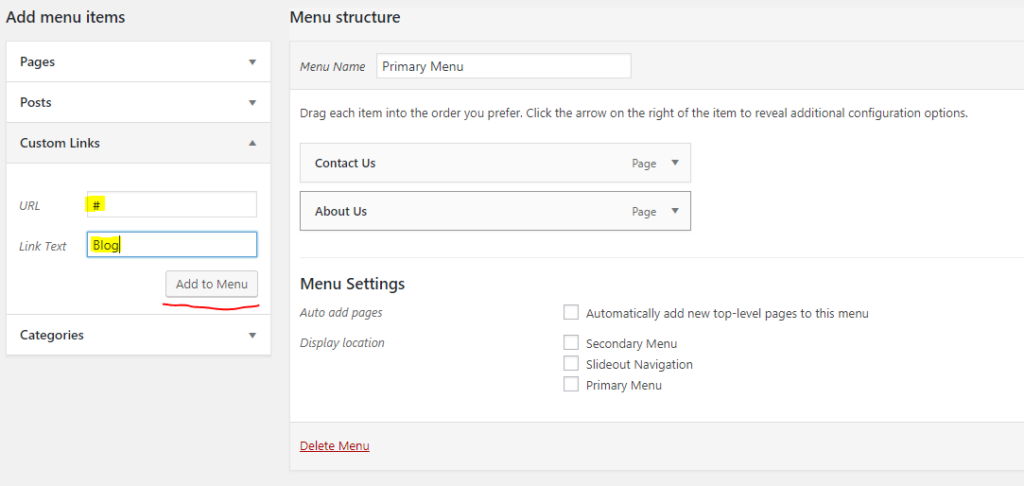
It will look like this when you are done.
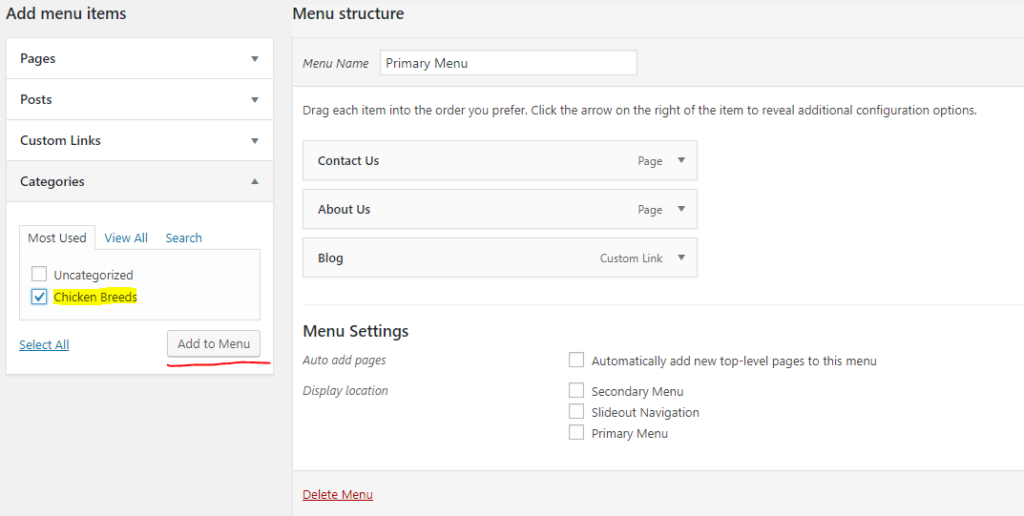
Then I add the Chicken Breeds category to the Primary Menu by selecting it from the left-side under Add menu items and then clicking the Add to Menu button.
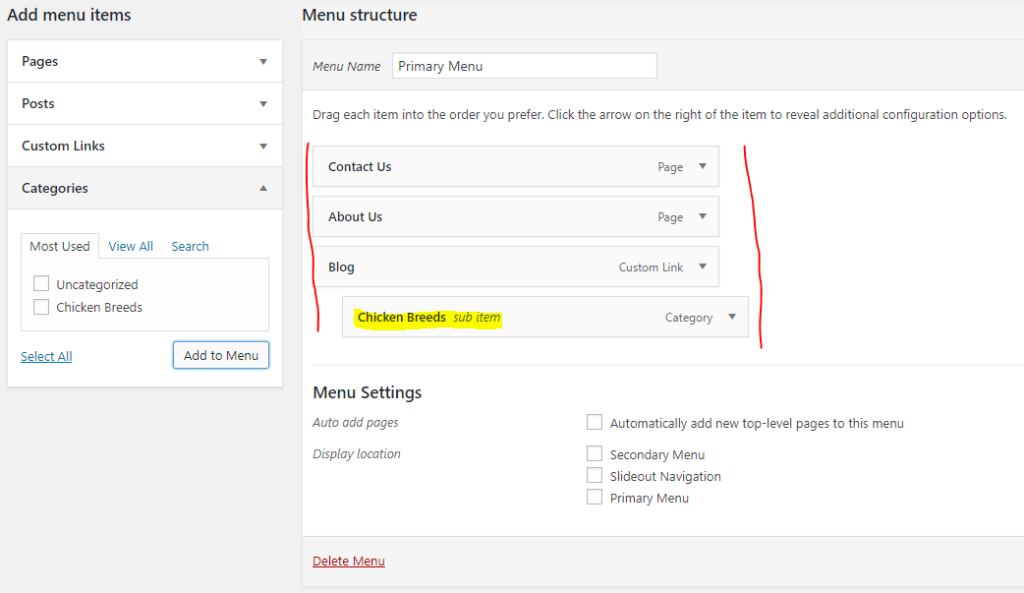
Then I drag the Chicken Breeds category to the right and nest it under Blog. This makes it a sub-item. This step will need to be repeated every time you create a new Category. Nest it under Blog on the Menu structure.
Determine the Display Location
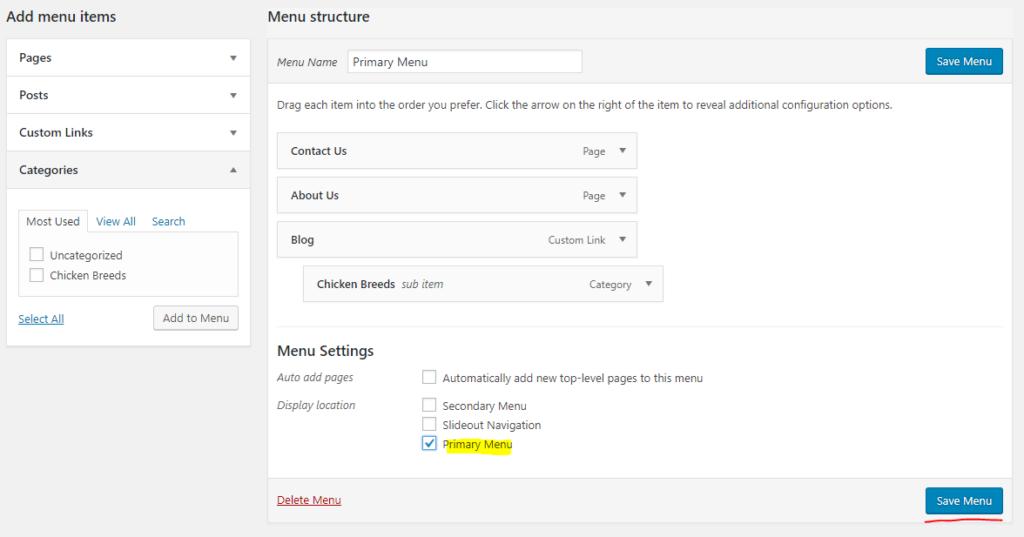
To make this Menu show up on the top of the blog as the Primary Menu, check the box for Primary Menu and click the Save Menu button.
Note: The location Primary Menu is specific to the GeneratePress Theme that I am using for this tutorial. It may be called something different on other Themes.
Testing the Menu
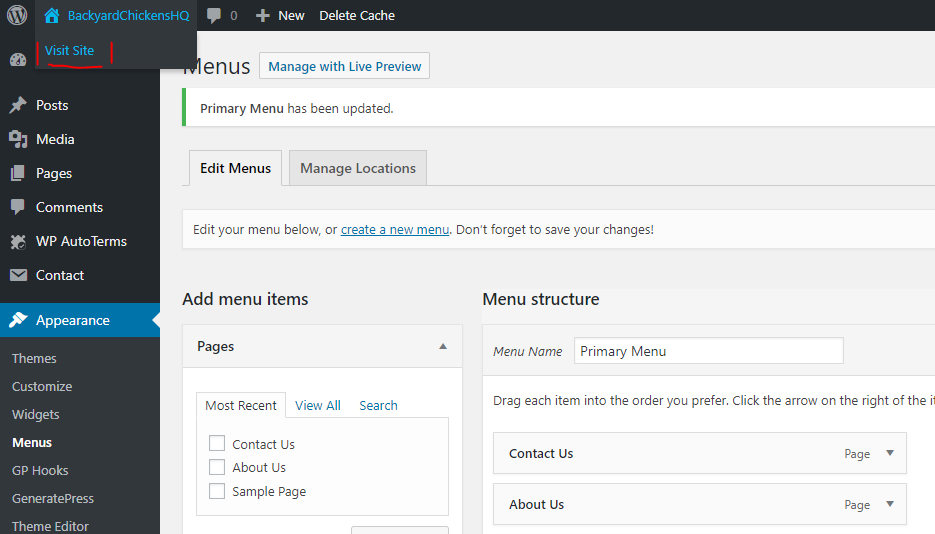
Now that the Primary Menu is all built out and saved, it is time to test it out on the blog. Go up to the very top-left corner of the Dashboard, hover over the Site Name, and then click the Visit Site link.
Now you will see a working menu at the top of the blog near the logo.

