At this point, everything is setup and ready to go. We just need to go in and start blogging. The easiest way to manage everything on your blog is through your Dashboard found inside the BlueHost Customer Portal.
Here is a link to it:
https://my.bluehost.com/web-hosting/cplogin
You should have received an email with this link, but I highly recommend that you bookmark it for easy access.
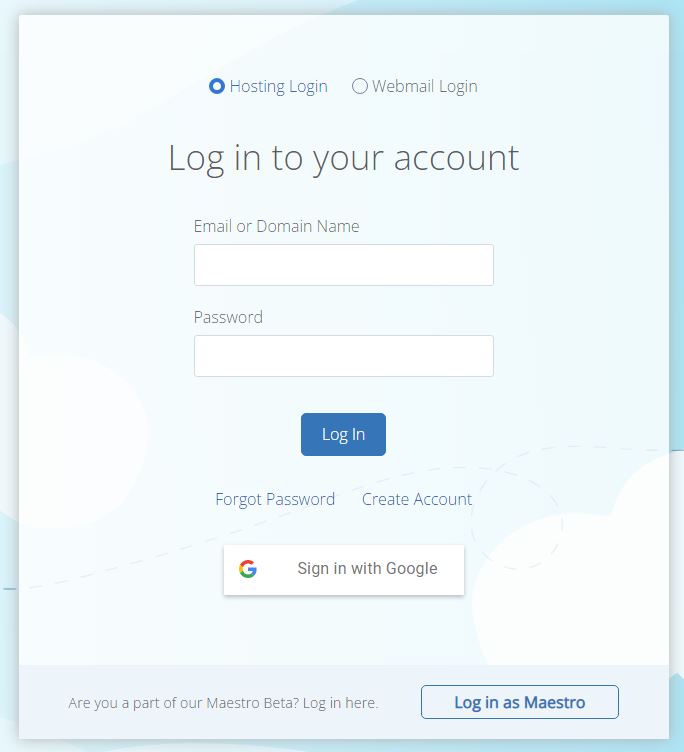
Access the BlueHost Customer Portal
Enter your Email Address or Domain Name and password.

(Use the Forgot Password link if you get stuck)
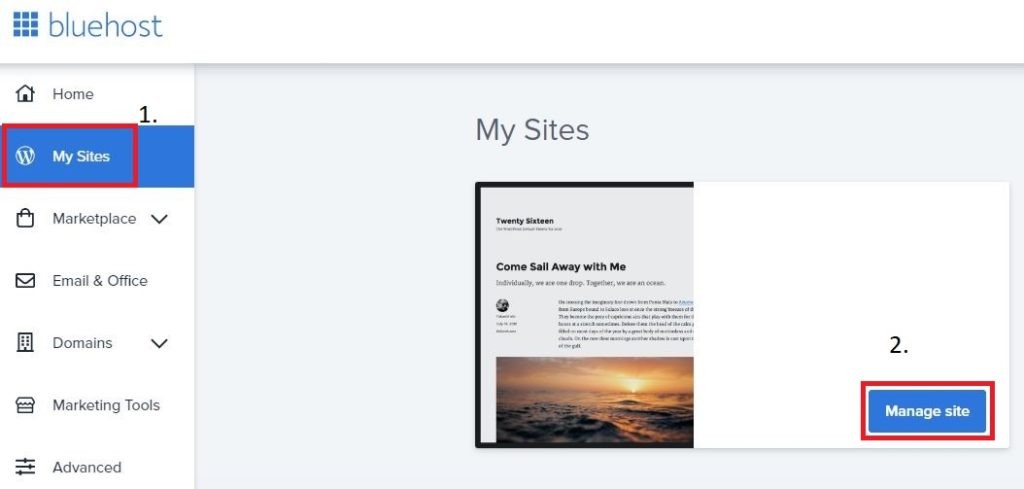
Access Your Blog Dashboard
Click the My Sites button on the left-side and then click Manage site

You will be taken to the Dashboard and you will notice that WordPress is already installed and waiting to give you a big hug. 🙂

Everything you need is right here on your blog’s Dashboard. You can access the WordPress Admin by clicking Log into WordPress, which is where you add your blog posts and control the Theme of how the blog will look and feel. You can also manage your email addresses, the add-on features (SSL, Backups, Hacker Protection, etc.), and more.
This Portal page is going to be the door way into your blogging Empire, so get very familiar with it. Luckily, I think BlueHost has done a great job of making it straight-forward and easy to use.
